-

Introducing Fukushima by a Fukushima resident
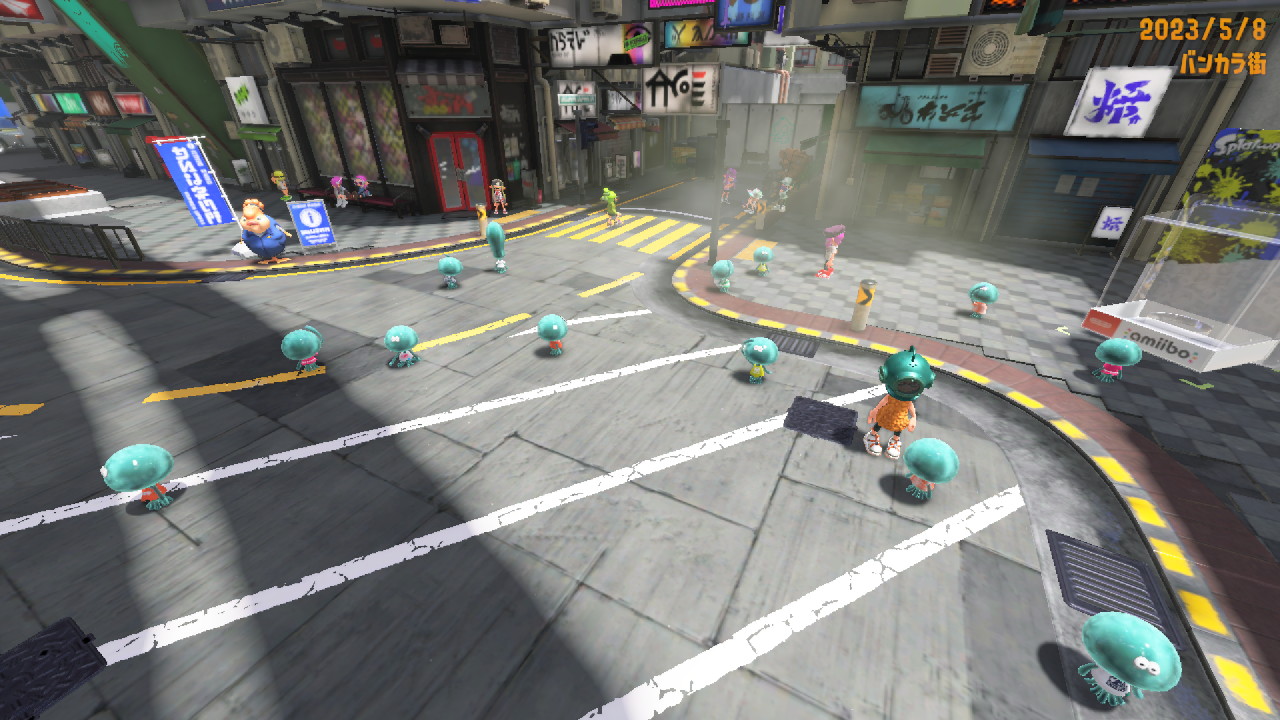
It is the third largest prefecture in terms of area after Hokkaido and Iwate, and it takes about five hours to drive from one end to the other on the local roads.It ranks 40th out of 47 prefectures in terms of population density, making it one of the most rural areas in Japan. However, this is due to the vast area of Fukushima Prefecture, and the urban areas of Fukushima are actually quite prosperous.I live in Fukushima City, Fukushima Prefecture, which is in an area called "Nakadori" by Fukushima residents. The reason is that it is exactly in the middle if Fukushima is divided vertically into thirds.And the most prosperous areas in Fukushima Prefecture are Koriyama City, Fukushima City, Aizu City, and Iwaki City. Of these, Koriyama City and Fukushima City are in the "Nakadori", Aizu City is on the left, and Iwaki City is on the right.If you live in Fukushima City, the area you can travel by car is roughly limited to Fukushima City, Koriyama City, and Aizu City. This is because it takes more than three hours by car to get to Sendai City (Miyagi Prefecture) in the north, and about the same time to get to Iwaki City in the east.I have only been living in Fukushima City for half a year, but I have been to several sightseeing spots. I would like to introduce them to you this time.First, I would like to introduce Fukushima City. Fukushima City flourishes mainly around the east exit of the station, and several festivals are held in the summer. This year, I participated in one of them, the "Waraji Festival." The "Waraji Festival" is literally a festival of straw sandals, where straw sandals with a total length of several tens of meters are raised like a portable shrine and rotated 360 degrees with a person on top, so the person carrying them runs around with great force. In August, Fukushima is close to the highest temperature in the country during the day, but it is very cool in the early morning and at night, and you can enjoy the festival while enjoying yakisoba, takoyaki, beer, and other food stalls. I got takeout Fukushima specialty disk dumplings from an izakaya near the station and ate them while watching the festival. I live in Fukushima City, so I'll be going home, but if you're here on vacation, I recommend staying at Iizaka Onsen in Fukushima City, a hot spring in Aizu City, or Ginzan Onsen. However, Ginzan Onsen is always fully booked, so be careful.Next, I'd like to introduce Aizu City. To be honest, I didn't think Aizu City would be that big, but it was bigger and more fun than I imagined. I liked the character "Akabeko," so I went to a place called "Akabeko Land." There, you can buy "Akabeko" goods and experience coloring. In the coloring experience, you are given a doll in the shape of "Akabeko," which is the original material for "Akabeko," and each person can create their own original design. I drew a "Space Beko," but my companion told me it was "Nasubeko" (eggplant). (Japanese eggplants are purple, which was similar to the color of the universe I painted.) Aizu City is also famous for its gourmet food, and the Kitakata ramen and tarekatsudon are very delicious.These are the places I've been to in the last six months of this year. I like reading, so I've been going to cafes around Fukushima Station, trying to cover every cafe there, so I haven't traveled much. Because of this, there isn't much information about Fukushima yet, but having actually lived there, I've found the land and people to be nice, and as the saying goes, "home is where you live," so I'd like to learn more about Fukushima.I'm also planning to go to Iwaki City at the end of this year, so I hope to post any information I get there here.See you next year. Happy New Year (Yoi Otoshi wo).
-

CSSアニメーションを動かしてみる
参考サイトはこちら(https://coosy.co.jp/blog/svg-animation-smil/) #wanco { height: 225px; width: 150px; } .cls-1 {fill: #fff;}.cls-2 {fill: #b8ba75;}.cls-3 {fill: #d88088; }.cls-4 {fill: #1aaab2;}
-

djangoをさくらのVPSにデプロイ!〜VPSレンタル編〜
ある程度djangoサーバの開発が済んだので、本番環境へのデプロイに挑戦しました使ったツールDjangonginxuwsgiさくらのVPSやったことVPSのレンタルドメインの取得VPSにSSH環境変数やコマンドの設定アプリケーションのデプロイuwsgiの設定nginxの設定上記の順に徐々にpostしていく予定です。なかなか大変だったのでいろいろ抜けているとは思いますが、気づいたら筆者がその都度修正していきます。〜VPSレンタル編〜筆者は何も知らないアホなweb開発初心者だと言うことをまず知っておいてください何も知らない私は「クラウドサーバにアップするぞ!」とまず最初に意気込み、つまづきました結局、いくら頑張ってもAWSに全然アップできず、必死に悩んで調べ、月5kと言う金を払ってアップできませんでした(勉強代)まず、前提としてサーバにはいくつか種類があります。(参考)レンタルサーバ(共有サーバ)VPS(Virtual Private Server: 仮想専用サーバ)専用サーバクラウドサーバいろいろ調べた結果、個人用webサイトを作るのに適しているのはレンタルサーバかVPSであると言うことを知りましたそして、レンタルサーバにチャレンジをしたところ、ここでまたつまづきましたレンタルサーバは管理者によって、インストールできるモジュールに制限されていたり、環境変数やDBの設定が自由にできないようにされていたりすることから、djangoサーバには不適だったそうですここでいざVPSのレンタル(参考: https://i-fc.jp/web/vps-rentalserver/#xservervps今調べてみたらXserverが一番お得そう汗他のサイトを見た時に一番出てきたので検索にヒットしやすいさくらのVPSを選びました初心者はやっぱり先導者が多いところがいいかもしれませんまず、CentOSを選択し、1Gのプランを選択(プランは後から変えられないみたいなので注意)次にパスワードと公開鍵の設定公開鍵の設定は検索するとすぐ出てきますが一応(参考)ssh-keygenで作成したxxx.pubの中身を全てコピーして空いているとこに貼り付ければok(これも今考えればGithub.comからインストールした方が楽だった...)スタートアップスクリプトなどもあるようで、これを入れればletsencriptも楽になったかもしれませんね...自分は手動でやっちゃったのでそれについて後ほど説明したいと思います契約が完了したら起動できるようになっているので、サーバ画面を開いて電源操作から起動を押してくださいこれでVPSのレンタルは完了です。
-

Djangoで全てのページに共通のコンテンツ・表示を作る
天気の情報をスクレイピングして表示したい!と考えた筆者しかし、スクレイピングしたとて一つのページでしか表示ができず、残念に思っていた今日この頃ある日、全てのページに共通させてカテゴリ一覧を表示するという神機能を知ったURL: https://blog.narito.ninja/detail/150これを参考に作ってみたBlogのアプリがあったので、その下にcontext_processors.pyを作成し、中身を書き書き def common_weather(request): context = {} url_forecast = 'https://tenki.jp/forecast/3/16/4410/13208/' fdict = scrape_weather(url_forecast) forecast = fdict["today"]["forecasts"][0] context["weather"] = "天気: "+forecast["weather"] context["temp_high"] = "最高気温: "+forecast["high_temp"] context["temp_low"] = "最低気温: "+forecast["low_temp"] context["rain_probability"] = "降水確率: " context["rain_probability_0006"] = "00-06: "+forecast["rain_probability"]['00-06'] context["rain_probability_0612"] = "06-12: "+ forecast["rain_probability"]['06-12'] context["rain_probability_1218"] = "12-18: "+ forecast["rain_probability"]['12-18'] context["rain_probability_1824"] = "18-24: "+ forecast["rain_probability"]['18-24'] return context 天気の情報はtenki.jpからスクレイピングしているscrape_weatherの中身は本題ではないのでスルーそしてこの関数をsettings.pyに追加した TEMPLATES = [ { 'BACKEND': 'django.template.backends.django.DjangoTemplates', 'DIRS': ['templates'], 'APP_DIRS': True, 'OPTIONS': { 'context_processors': [ 'django.template.context_processors.debug', 'django.template.context_processors.request', 'django.contrib.auth.context_processors.auth', 'django.contrib.messages.context_processors.messages', 'blog.context_processors.common', 'blog.context_processors.common_weather', ], }, }, ] 実際に表示してみると。。。できた!!!
-
Djangoでサイドバーを追加してみた
Djangoでサイドバーを追加する方法を調べてみたが、同じアプリ内でしかviews.pyからgetができないことがわかった(参考)そこで、サイドバーを特定のアプリ内で表示(cssでvisibility: hidden;)した状態で、base.htmlでスクレイピングしてみた1. まず、スクレイピングのため、jqueryのgetでurlを指定$.get("{% url 'blog' %}")2. 続いてdone()関数を用いて、スクレイピングした値を引数として受け取る$.get("{% url 'blog' %}") .done(function(data) { })3. dataは文字列なのでDOMParser()を用いてHTMLにキャストする$.get("{% url 'blog' %}") .done(function(data) { let parser = new DOMParser(); let doc = parser.parseFromString(data, "text/html"); })4. data内におけるスクレイピングしたい要素をHTMLのままelementに代入$.get("{% url 'blog' %}") .done(function(data) { let parser = new DOMParser(); let doc = parser.parseFromString(data, "text/html"); let element = doc.getElementsByClassName("xxx")[0].innerHTML })5. あとはdocumentに入れるだけ。insertAdjacentHTMLの引数のafterendは色々変えられるみたいなので代入したい場所に応じて変えると良い(参考)$.get("{% url 'blog' %}") .done(function(data) { let parser = new DOMParser(); let doc = parser.parseFromString(data, "text/html"); let element = doc.getElementsByClassName("xxx") appendText(element[0].innerHTML); function appendText ( text ) { let element = document.getElementById( "yyy" ) element.insertAdjacentHTML("afterend", text ) ; }; })ちょっと色々試行錯誤して大変だった
-

DBにカラムを追加したよ!
ここを参照(リンク)DBに新しくカラムを追加したいと考え、試しに適当にフィールドを追加class Post(models.Model): title = models.CharField('タイトル', max_length=200) category = models.CharField('カテゴリ', max_length=200) text = models.TextField('本文') date = models.DateTimeField('日付', default=timezone.now) redate = models.DateTimeField('更新日時', auto_now=True)しかし、エラー出てしまうIt is impossible to add a non-nullable field 'category' to post without specifying a default. This is because the database needs something to populate existing rows. Please select a fix: 1) Provide a one-off default now (will be set on all existing rows with a null value for this column) 2) Quit and manually define a default value in models.py.どうやらnullにできないカラムは追加できないそうそこでnullでも良いカラムとして追加class Post(models.Model): title = models.CharField('タイトル', max_length=200) category = models.CharField('カテゴリ', max_length=200, null = True) text = models.TextField('本文') date = models.DateTimeField('日付', default=timezone.now) redate = models.DateTimeField('更新日時', auto_now=True) % python3 manage.py makemigrations 1.24.1 Migrations for 'blog': blog/migrations/0006_post_category.py - Add field category to post成功!!!
-

Blogを更新した
今日はBlogの機能を少し更新した - トップページのindex.htmlにアクセスすると最新記事にリダイレクトされる - ページから次のブログ、前のブログに遷移を可能とするボタンの実装 次はこの編集ページをより見やすく、編集しやすい表示に変えたい
-

新しい機能付けたが...
天気予報を見れるようにしたけどBlog listにアクセスしないと表示されない問題 まあ見たければここに来ればいいのだけれど... なんか違う!!常に表示して欲しい!!! でも方法がわからないー
-
検索機能
見たいblogをタイトルや日付で検索できる機能が欲しい
-

DjangoのBlogを作成
BlogのメニューバーからTopとPostに遷移ができる仕様にした Top画面でBlogのリストを新しい順に見れるようにした。また、Postから新しく投稿できるようにした。 さらに、Top画面でblogの詳細、編集、削除が可能になっている UIも見やすい形に変更
-

Blog完成!!
なんとか完成させることができました! おめでと〜〜 編集もしてみました

